

I have a lot of people ask me how long it takes me to make a piece of jewelry. So, I decided to put this bit together so you can see my process. This is an example.
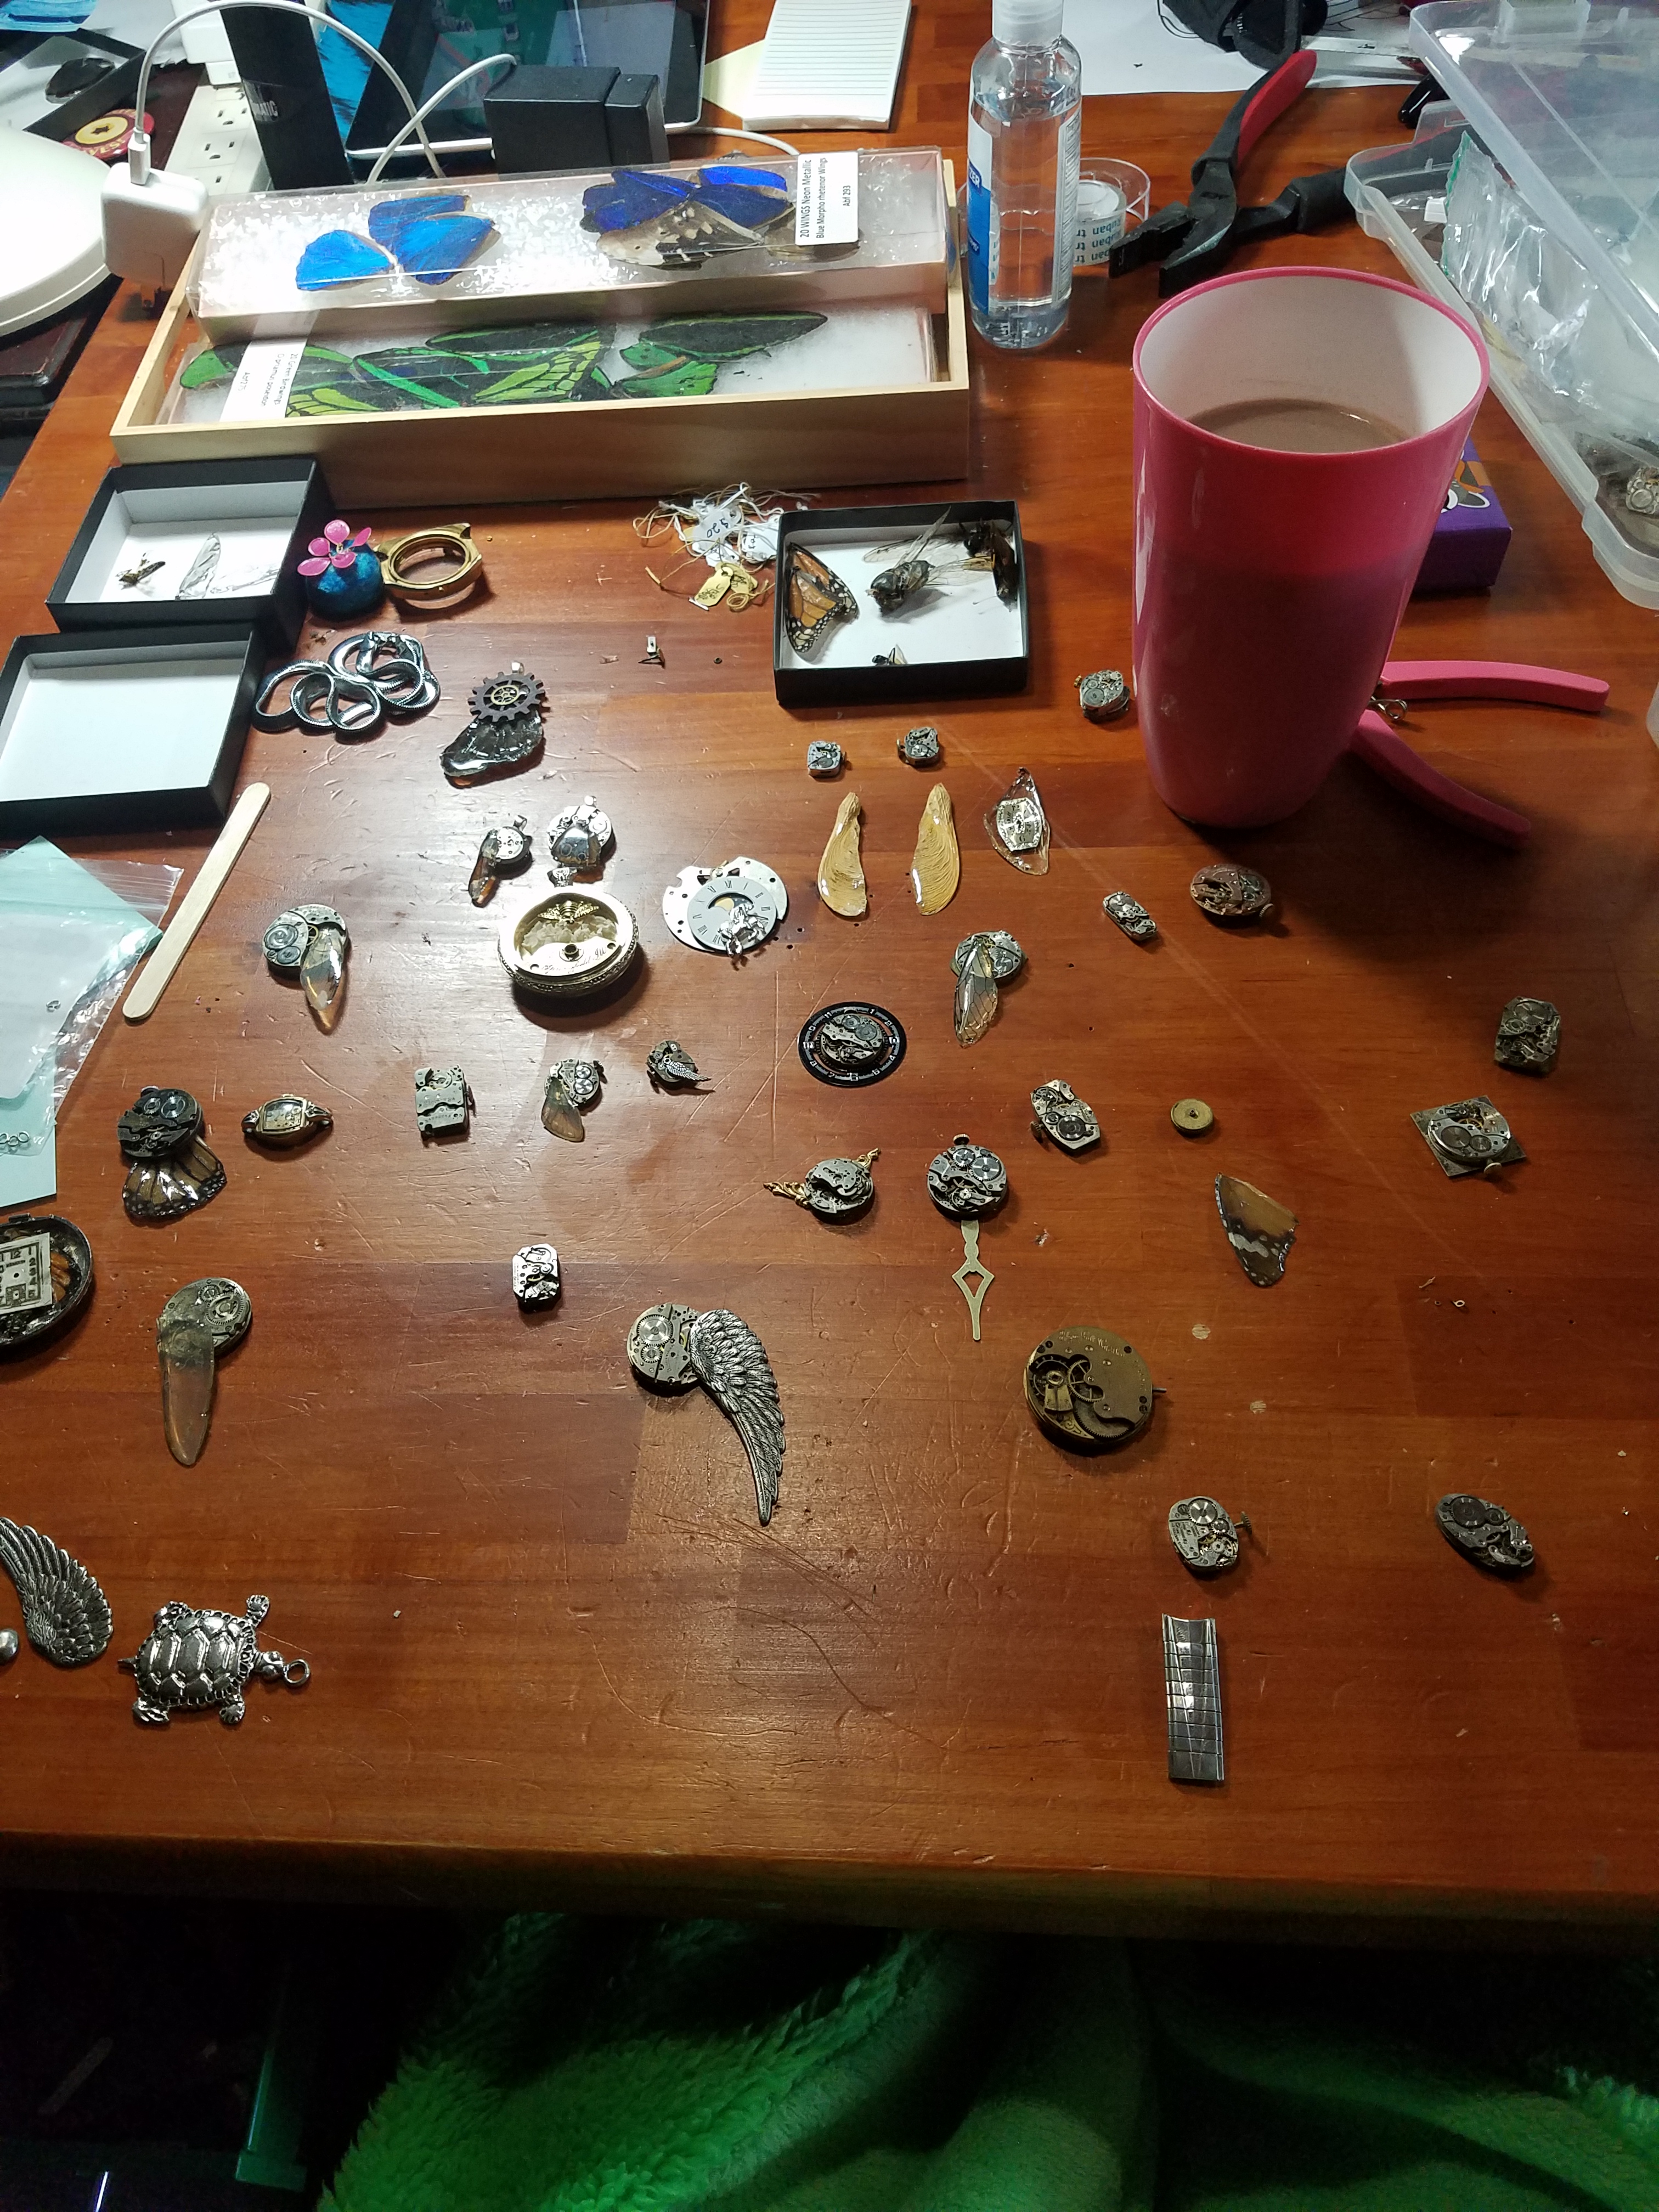
On the first night, after I had eaten my dinner, I went downstairs into my basement, where my studio is located. I went through my boxes and picked out some random items that I had, some insect wings that I had already resined, and my box of watches and watch parts. I lay things out and play with the parts, arranging items next to each other or on top of each other until I get some shapes and designs that I like.

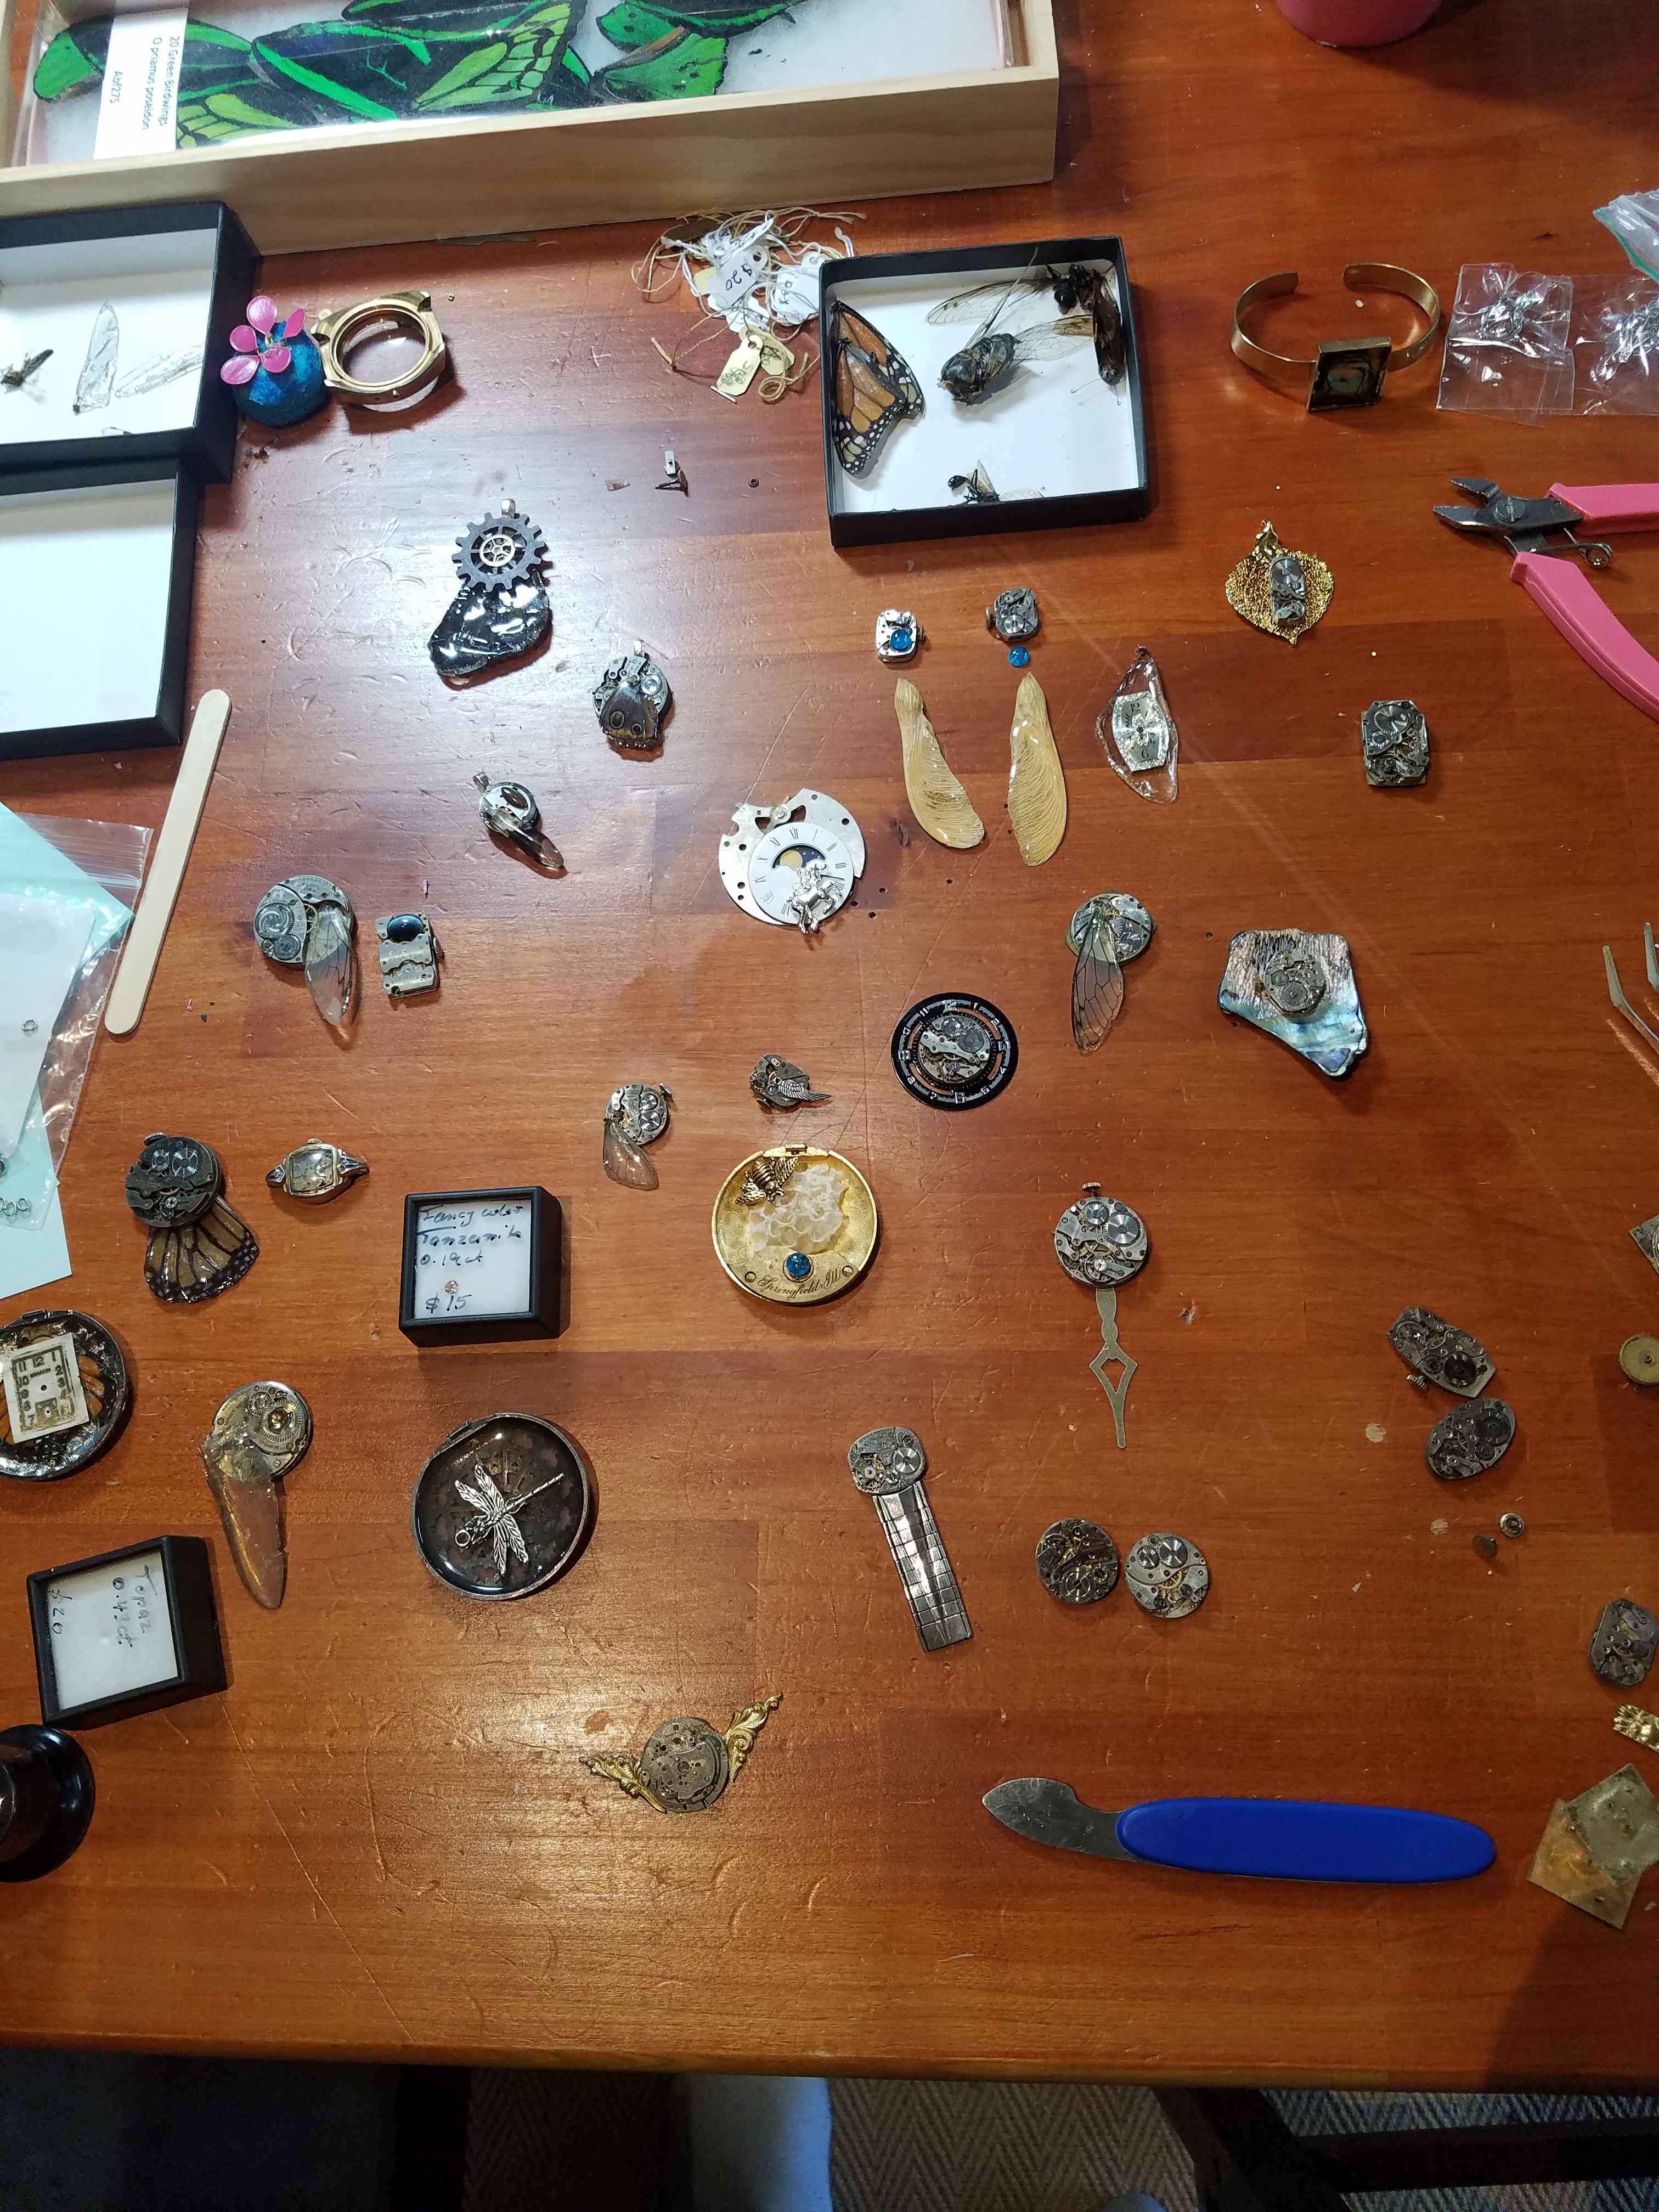
By the Second night, I have more ideas that are visible. I have items next to other parts. Pieces are loosely arranged but nothing is attached yet. I keep items out and arranged over many days, because some of the pieces I have out in this picture, did not make the final cut.
On the third night, I move on to decorations. I take out my gemstone box, as you can see here, above, and I go through some ideas placing various gemstones on the pieces. Sometimes, the item doesn’t need a gem, but uses Swarovski crystals instead. My box is smaller than the one in the pictures, but with more crystals. This process took about 3 hours that night.
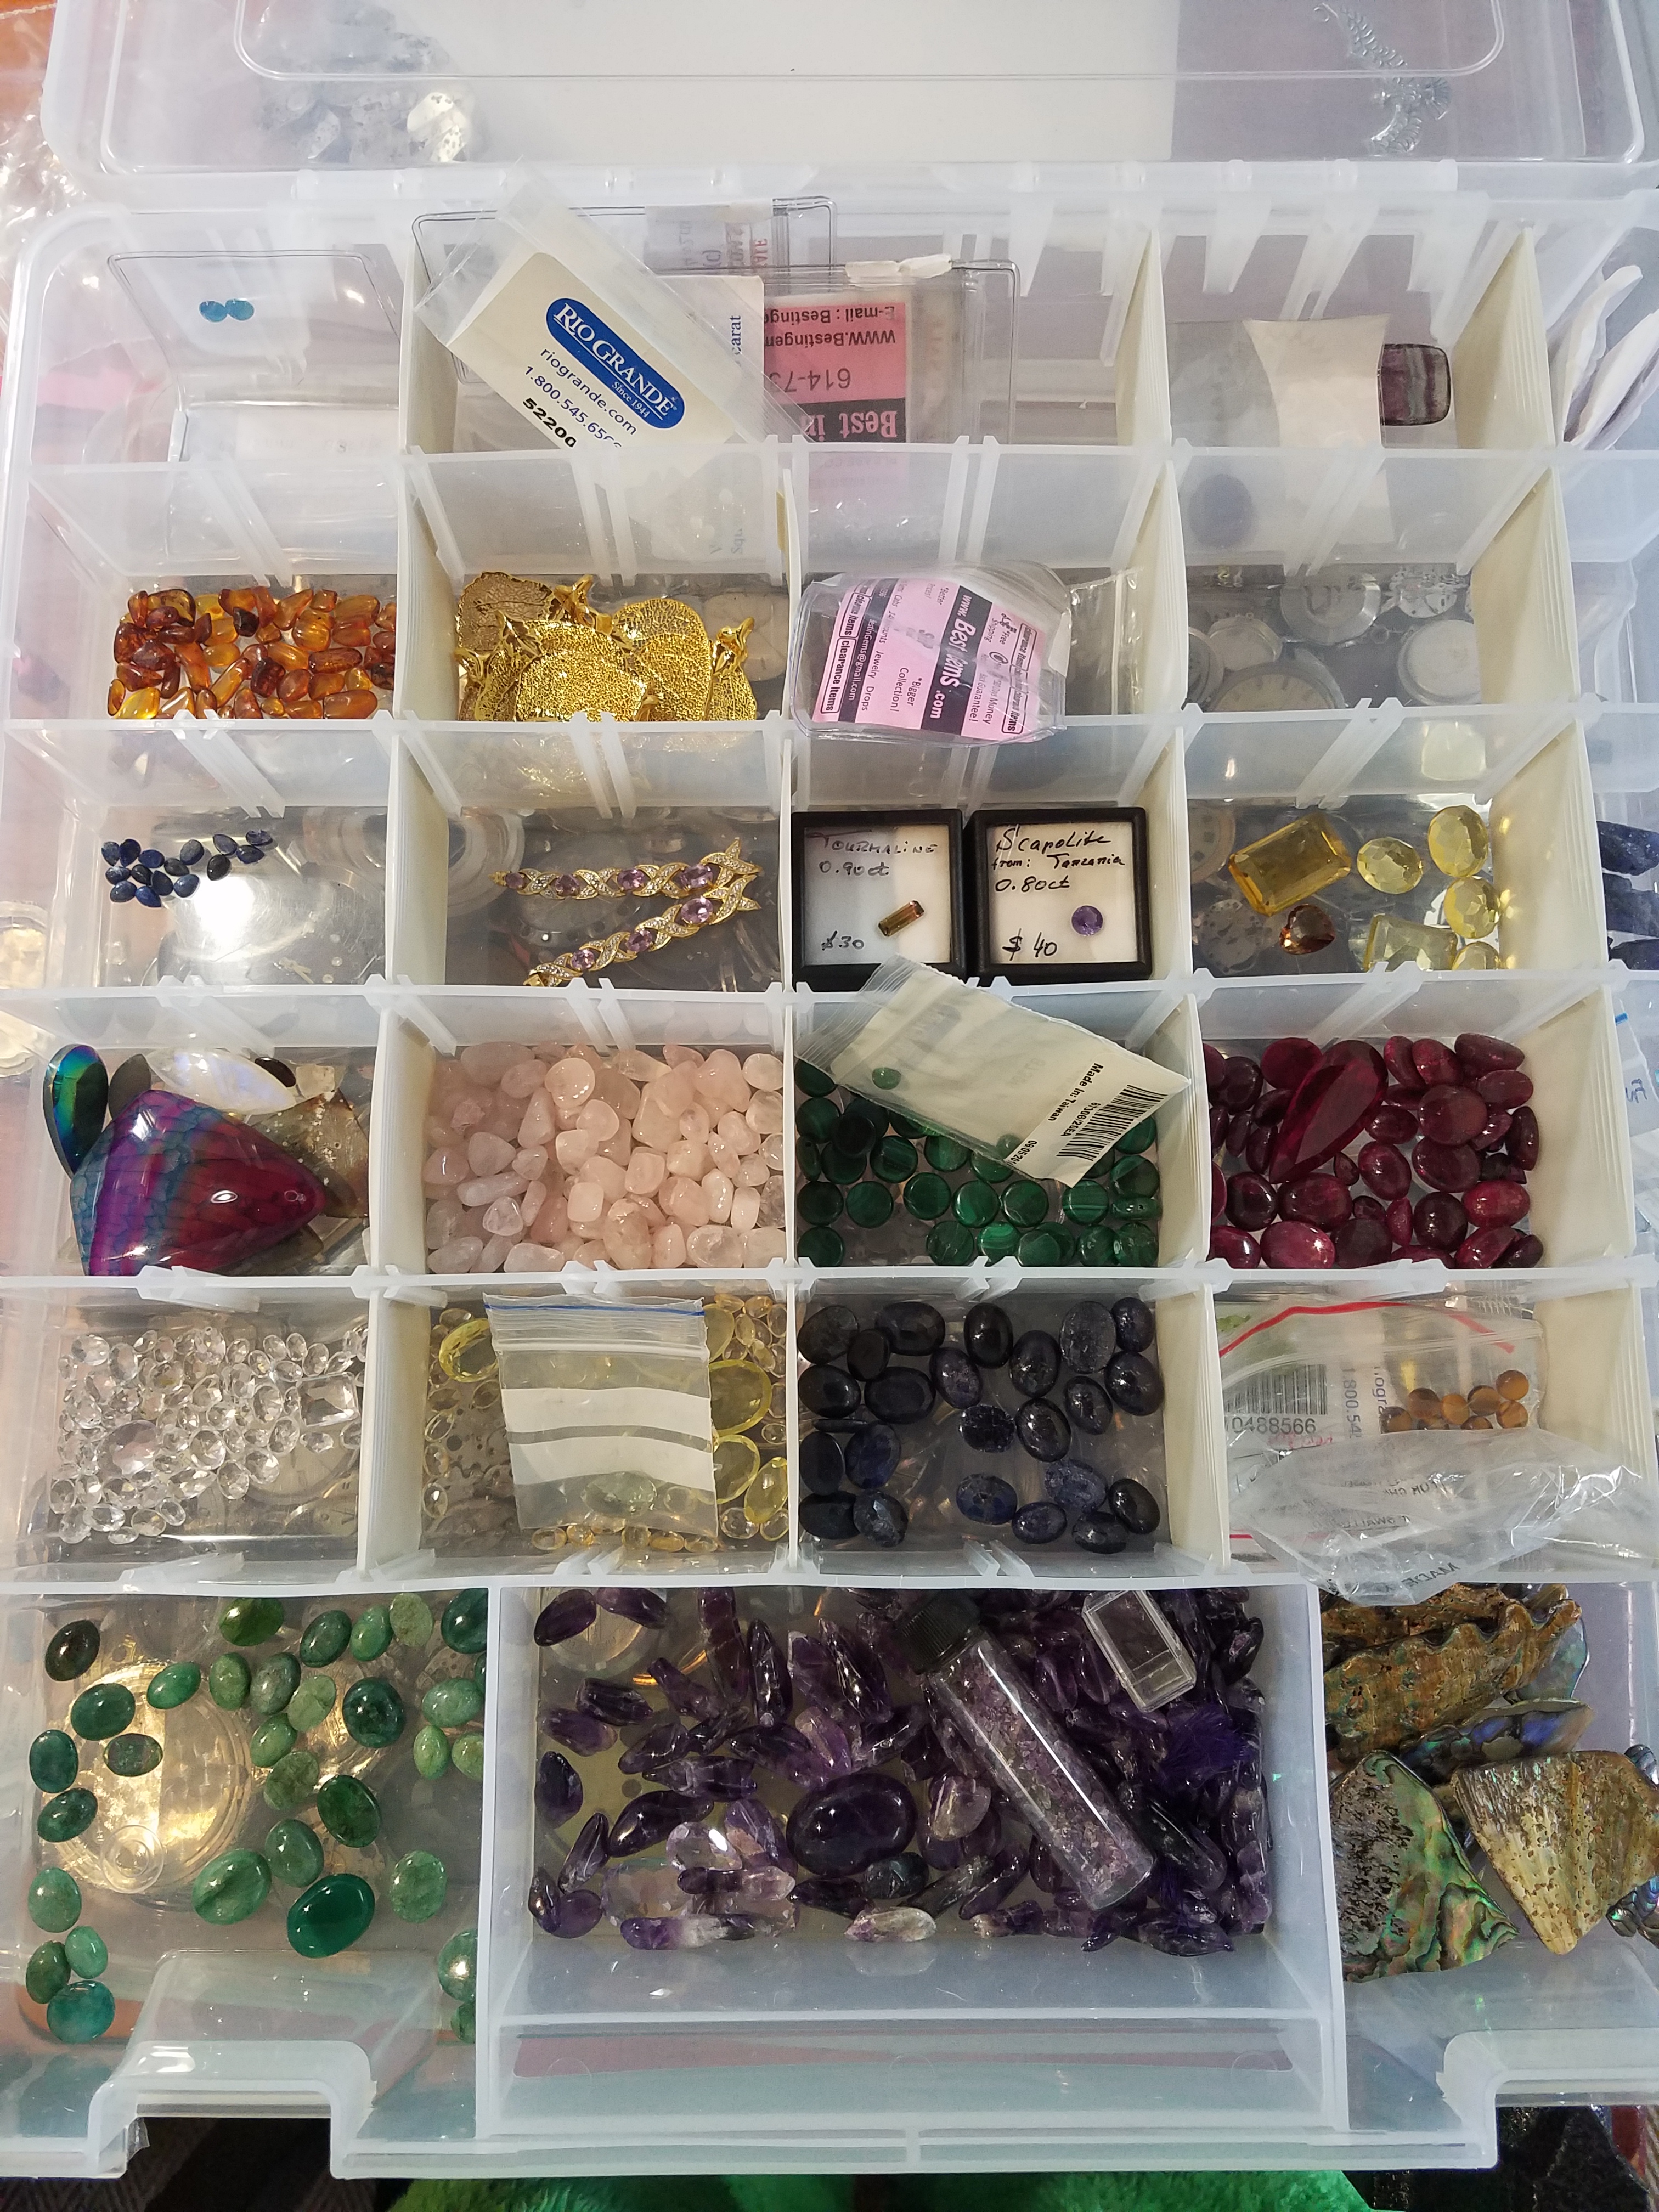
As can be seen, I started to add some blue gemstones to some pieces, adding a topaz to another and started to bring out the crystals.
On the fourth night, I start to attach and glue items together. This is where the magic happens. Attaching the pieces together means that I see whether I like the pieces or not. I hear a lot of artists complain about their work and some of them even hate what they can make. I understand that I create items that are not for me, but for other people and everyone likes at least one thing I create. I don’t have to like it or love, I just have to think it works together. I feel as though the items tell me how they are designed or that I know already. I could show my Nerd level, and suggest that a Time Lord, in the show Doctor Who, has something called “Time Lord Knowledge”, where their brains contain all of the history of everything through time. This allows the Doctor to travel to any point in time and any location and know how the events are supposed to happen. I feel as though some of these jewelry pieces are already assembled in my mind and I know how they are supposed to be assembled.

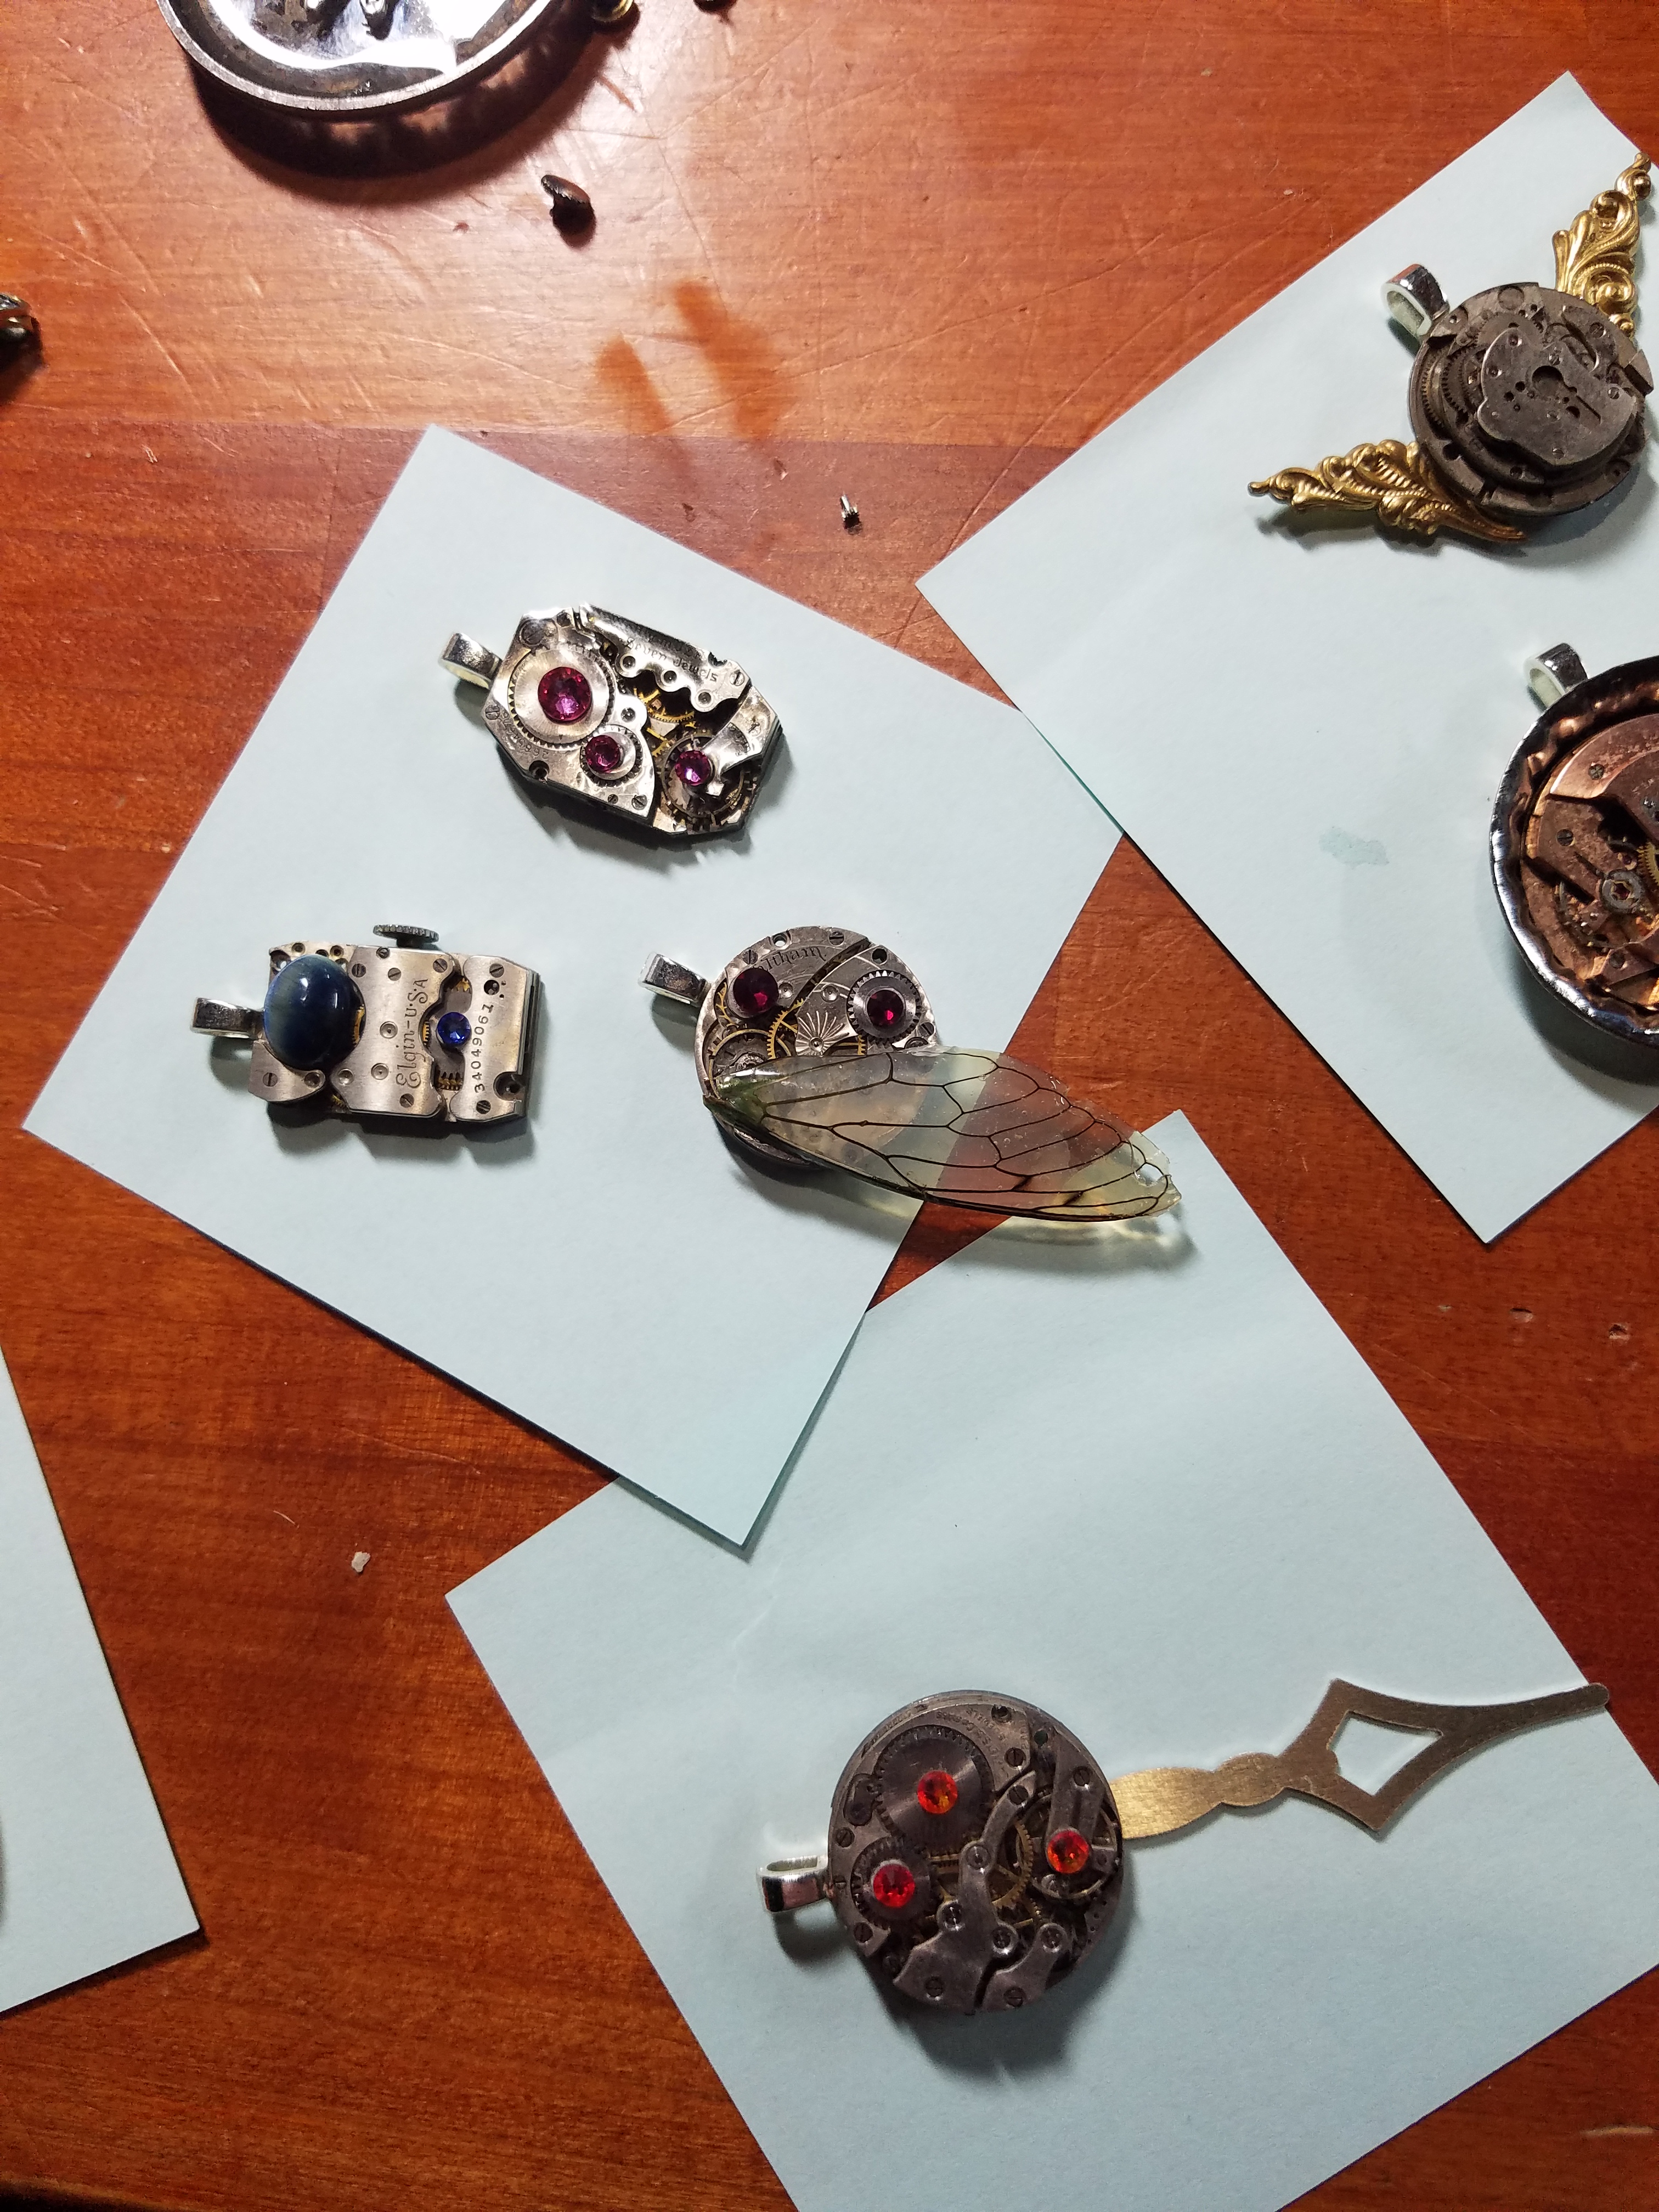
I also work to attach the bails onto the back of each piece of jewelry. I use silver plated bails and I’ve always done this process on Post-It notes, so any of the glue will stick to the paper and not the table.
On the fifth night, I lay everything out on trays that have been lined with Parchment paper. I then go and get my resin measured and mixed. As far as resin is concerned, I used to use cheap stuff and then went with the more expensive brand that Rio Grande offers, called “Colores”. The problem with that brand was, the resin would slowly color yellow, over time and with a reaction to UV light. So, resined pieces that I had, displayed on a booth, outside in the sun, would have a yellow tint to them by the end of the day. I started to search the internet and went with a product by the company Smooth-On, called “Tarbender”.
Tarbender is a resin that is durable and used for bar tops. It is also UV resistant, so I have been able to take pieces into the sun and not have them color or get hot. It is far less expensive than the Rio Grande brand.

I also use the parchment paper because parchment paper has a thin layer of silicone added, during the production and the resin I use, does not stick to the parchment paper. For most of my pieces, I do not use the resin, except, to cover the area where the bail meets the pendant. This adds a second layer to trap that bail on so it doesn’t come off of the pendant. I have made over 500 pieces of jewelry and I have not had a single bail fall off, because of this process.
On the 6th night, the resin has had 24 hours to cure and I come back down to my basement studio to inspect my work. I take the rest of the time to add chains to the pendants or to attach hooks and jump rings to the earrings. I then spent the next day, taking pictures of the jewelry for my site and store, adding price tags and making sure there are not any final issues that need to be taken care of; like a rough spot of resin that gets ground down with my dremmel or file.
Overall, the process takes about 7 days, from the beginning of thinking of ideas to the end where I add price tags and pack the pieces up, in my cases.
